
I'm super excited to launch the new 2023-2024 Mid Year Cyberry iPad digital planners. We've got some new, exciting things this time around so here is a setup guide for GoodNotes users.

Device and App Compatibility
The device I'm using is the 12.9 inch M2 iPad Pro with Apple Pencil 2 and the GoodNotes application. You can view full device and app compatibility here.

Please make sure you're using Safari and also that you are familiar with locating the Downloads folder in your iPad's files app. You can search for the Files app and on the sidebar there should already be an existing folder named Downloads.

Download Library
Once you've purchased the planner, you will receive this PDF file, which stores all the download links for each planner variations and the bonus content, such as the stickers, covers, and app icons. You'll find this download library pdf in the Downloads folder I mentioned earlier after you download it from Safari. You can tap on the share icon on the top right and choose to open the file in GoodNotes.

Read-Only Mode to Use Hyperlinks
Once you have it open in GoodNotes, make sure you have read-only mode turned on.

Customizing the Mid-Year Planner
From the top of the Download Library, you’ll see links for customizing your planner, downloading the bonus content, and then accessing this tutorial and installation guide.

From the first page of the Download Library, we can click to being customizing our planner first. You’ll start by choosing whether you’d like your planner to start the week on Monday or Sunday.

In this particular example, I’m going to download the Sunday start version, so I’ll choose that option. The next step is select your preference for how the weekends are designed, whether you’d like the weekends shaded or not. In this case, I’ll go with weekends shaded.

The next customization for this year’s planners are whether we’d like times on our vertical weekly spread. You can choose between having the times shown or not. I’ll select the vertical times option as an example.

And then lastly, we can customize the daily layout. You can choose from the classic option you might already be familiar with from previous Cyberry planners, or you can choose from the new daily page that features meals, self-care, and other changes. I’ll select this option.

You can then review all your selections on this page, so again I went with Sunday start, weekends shaded, vertical times, and the new daily layout for my mid-year planner customizations. If you need to make changes to these customizations, you can choose to start over by clicking the button. It will bring you back to the first page to go through those selections again.

And of course, you can reference this installation guide if you need help going through these steps.
If these are your custom selections, you can click the download planner button to proceed. If you ever need to contact support, make note of your planner code so you can provide this to support. This will allow me to help you faster since there are many planner variations. You’ll be prompted to open a page in safari after downloading and you’ll see the planner file will load up here. You will then want to tap the share icon in the top right corner and choose to open it in GoodNotes.
Hyperlink Tour
Now your planner is imported into GoodNotes, and it’s ready to go. Make sure you have read-only mode turned on, so you can start using the hyperlinks. You can also double-tap on the screen with your finger so that your planner fills as much of the screen as possible. From the first page of the planner, you can find links for watching these respective tutorials on installing and setting up your planner, as well as buttons for joining the Community, which has even more free downloads and to connect with others, and then contacting support. You can also download the bonus content directly from your planner in addition to using the download library as well. And then if you purchased the Apple Calendar version of this planner, you’ll find a section down here about activating those Apple Calendar links, which will be covered later in this setup guide. On the left-hand side of this page, you’ll of course see all of the contents of the planner.

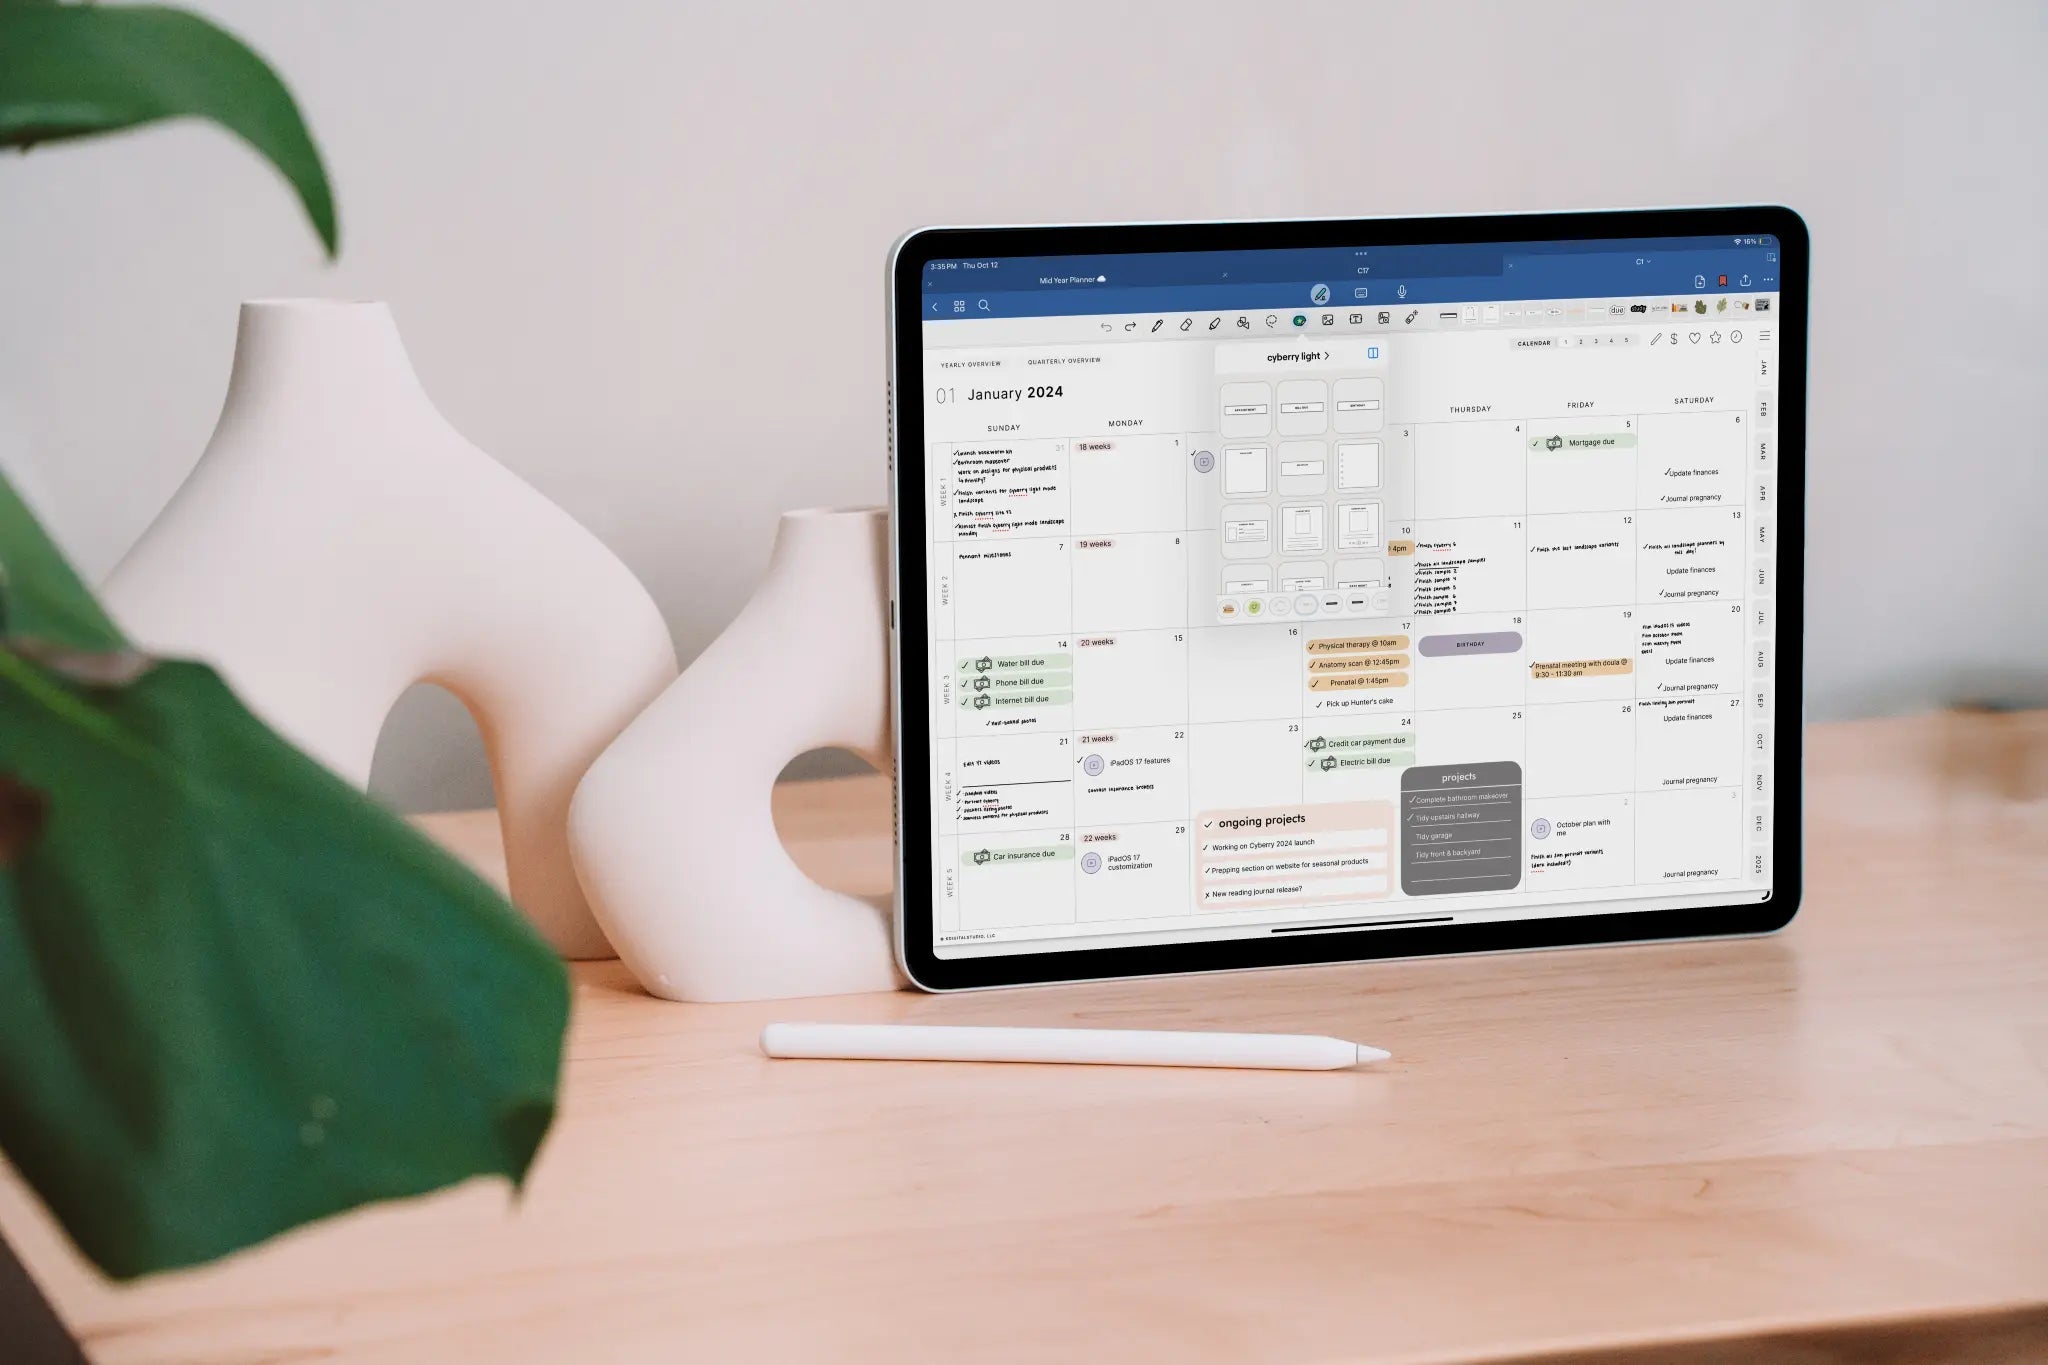
If I click into July, you’ll see that there are five calendar options that you can use. This is great if you like to separate your monthly calendars by personal, work, school, or other large categories.
From the top-left, we can access the 2023-2024 yearly overview and the quarterly overview pages. From the yearly overview page, we can access the daily pages as well as the vertical weekly pages for the respective months. From the weekly page, you can see that we can switch between the vertical weekly style, where I customized it by choosing the times version, and then the horizontal weekly style, and a custom weekly option for creating or pasting in your own favorite weekly layouts.
From our weekly pages, we can access the daily pages from the mini calendar, as well as the weekly dates on both the vertical and horizontal weekly layouts. Similarly, we can access other daily pages from the links on the mini calendar of our daily page, as well as the three respective weekly layouts. You’ll see we also have these icons in the top right, which will lead you to notes, finances, wellness, goals, and review for the respective month. And if you need to switch months from within one of the icon sections, you can click either 1-12, which represent january through to december.
From the monthly page, you can access the daily pages by clicking the respective dates. You can also access all three weekly layouts from the weekly box. If you click at the top of the respective weekly box, you’ll be prompted to the vertical weekly layout. The center of the weekly box will bring you to the horizontal layout. And the bottom section of the weekly box brings you to that custom weekly layout. The hamburger icon will lead you back to the main page of the mid-year planner. The login and logout pages can be accessed from this main page, and these are great places to reflect on your goals and tasks for the year and essentially serve as your planning and review pages for the entire year.
Using Notepapers and Section Dividers
From the front of your planner, you can also access popular notepaper styles and there are 12 notes sections. By clicking into one of these notes sections, your planner will convert into a notebook where you can create custom notes and file them under these different sections. To build your note sections, head to the template you’d like to use and on the top right, tap the three dots then tap copy page.

You can then head to the section you’d like to use and tap the plus page icon. Make sure after page is toggled on at the top and click paste page.
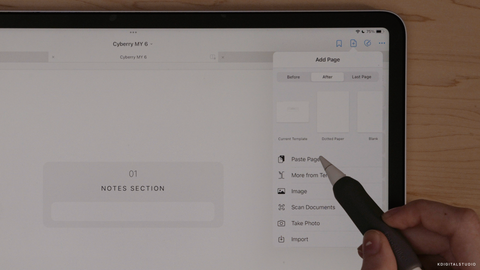
It will then paste the template after your notes section. You can also go to the thumbnail view to move and drag pages under the section of your choice or duplicate templates here by clicking the down arrow.


Downloading Planner Covers
Now that you’ve downloaded the planner, let’s move on to the planner covers. Remember, we can download the bonus content directly from our planner or we can use the Download Library. I’ll head back to the download library to download the planner covers. After clicking the download button, a window will pop-up in safari to confirm I want to download.

After hitting download, you’ll need to navigate back to the downloads folder on your iPad. The file first comes as a .zip file since there are multiple covers. I can simply tap to unzip the file and access the covers from within. Now that you’ve downloaded the planner covers, let’s head back to your planner in GoodNotes.
From the first page of the planner, tap the plus page icon. Make sure before page is toggled and then tap import. You’ll then navigate to the planner covers folder that we unzipped in the downloads folder. And select the planner cover you’d like to use. With a planner cover added, we can now see that the planner cover is the new thumbnail of our planner in our documents gallery of GoodNotes.

Downloading Digital Stickers
Now let’s move on to downloading the digital stickers. Head back to the download library or from the inside of your planner to download the stickers. Just as with the planner covers, a window will pop-up in safari to confirm we want to download the stickers after tapping the download button. After hitting download, you’ll navigate back to the downloads folder on your iPad. Tapping on the zipped file will unzip its contents.
You can see that there are four files for the stickers. The first two represent GoodNotes elements collection and the file type ends in .collection. The third file type is a goodnotes precropped sticker sheet, which ends in .goodnotes. The last file type are the individual PNGS, which ends in .zip, which means it will need to be further unzipped to access it contents.
I am going to start by sharing the first elements collection to GoodNotes.

You’ll see the collection automatically populate into GoodNotes. You just need to click create. You’ll repeat that same process for the second elements collection. These stickers can then be accessed from anywhere within GoodNotes by tapping the elements icon in the toolbar and selecting the sticker you’d like to use.

Now let’s import our precropped sticker sheet, which is another type of file we can use if we prefer them over elements. I’m going to click the file that ends in .goodnotes and share this to GoodNotes. From the precropped sticker sheet, you can lasso, copy, and paste your preferred stickers over into your planner with these two windows open.

The final way of using digital stickers with individual PNGs, and if you are not a Goodnotes user, you will need to use this method of using digital stickers. Because this file ends in .zip, tapping the file will unzip its contents. From inside, I can see folders for the respective PNG files. I can split screen this window with my mid-year planner to drag and drop the stickers I’d like to use.

Creating a Planner App Shortcut
I’m going to add the planner as a homescreen shortcut. First, you can head either to your planner or the download library to download app icons to customize the app shortcut. Again, there will be a pop-up window to confirm you’d like to download the app icons from Safari.

And we can access these app icons by navigating back to the downloads folder of the iPad.
To create an app shortcut, we’ll search for shortcuts on our iPad. Tap the + icon to create a new shortcut. Search for open app and select GoodNotes from this list. You’ll then search for GoodNotes and simply tap the name of your planner. In this case, it is Cyberry MY 6. I can test to make sure my shortcut works by pressing the play icon.

After verifying the shortcut works, tap the share icon and then add to homescreen. From here, you can change the name of the shortcut and then the icon. Tap choose file and navigate to the folder of the app icons from the downloads folder of your iPad. And then press add.

You now have an app shortcut that will open your mid-year planner when you tap it from the homescreen.

Apple Calendar Integration
Now let’s discuss the Apple Calendar integration. This is an option you chose at check-out. If you did not purchase the Apple calendar integration and you now would like that integration, you will need to head back to the shop to purchase that version of the planner. At check-out, you can also choose between the portrait or landscape version of this planner as well.
To use the Apple Calendar integration, you will need to head to Settings, Shortcuts, and then toggle on Private Sharing if it not already toggled on. You can toggle this setting off after downloading the Apple Calendar integration if you wish.

You’ll then navigate back to your planner and tap the Activate Apple Calendar links button. It may open the Shortcuts app on your iPad. Now the Apple Calendar integration is activated. If you head back to your mid-year planner, you will find that you can use Apple Calendar events and reminders by clicking this calendar icon on daily pages. Again note, that if you do not have the Apple Calendar integration version of this planner, then this calendar icon will not work.

Tapping on this icon, you’ll be prompted with whether you’d like to create an event or reminder. An event will live inside your Apple Calendar, whereas a reminder will live in the reminders app. You can use your keyboard or scribble to write about the reminder or event.

If you select reminder, it will ask what list you’d like the reminder to live. And these will be categories that you’ve created in reminders already if you have. If you tap event, you will be asked about the event’s start and end date and time.

This is just a nifty little integration that you can use alongside your daily planning if you need push notifications about these events or reminders. And it allows you full control over which lists or dates and times that you need to be reminded, so if you need to make a reminder for the tomorrow for instance, you can do that from today’s daily page.

So that's it for the installation and setup guide. If you prefer to watch the setup video guide, you can do so here.
If you need assistance with a mid-year planner order, please use the Help Library to submit a formal ticket. We cannot monitor the comments section for specific order and help requests.

Share:
How to Make Digital Sticker Sheets for GoodNotes
Favorite Fonts for Digital Planning
1 comment
Purchased your planner but cannot get into Cyberry Circle Community with this email. No matter what I click it says I have no access