


One of the best parts of a digital planner is that you never run out of pages. Need a fresh notes page for a meeting, a second habit tracker, or a dot grid page to sketch something out? You can add as many as you want, exactly where you want them. This tutorial walks you through how to use inserts and templates in GoodNotes and Noteful, including how to copy a template that's already in your planner, how to bring in a separate insert file, how to place an insert or template on a specific page as an image, and where to put everything so your planner stays organized.
What are inserts and templates?
You'll see these two words used a lot in digital planning, and they're really simple:
- Templates are the reusable pages built into your planner, like lined, grid, and dot grid notepapers, or a weekly layout you love. Many KDigitalStudio planners (including the free starter planner) have a Notepapers section with one of each style, ready to copy.
- Inserts are extras that come as their own file, like a budget tracker, a reading log, or a meal planner. Inserts can be PDF files, which you add as new pages, or PNG files, which you place on a page as an image (just like a sticker).
Either way, the idea is the same: you're adding a layout to your planner. The only difference is whether it becomes its own page or sits on top of a page you already have.
What you'll need
- A digital planner open in GoodNotes or Noteful. (Need to import your planner first? See how to download and import your planner.)
- For inserts: the insert files, downloaded and unzipped in your Files app. For PNG inserts, it helps to save them to your Photos too.
Part 1: Using the templates already in your planner (GoodNotes)
Method A: Duplicate a template page (easiest)
This is the one you'll use the most. It makes an identical copy of any page in your planner.
- Go to the template you want to use. In our planners, tap the notepaper style you want from the index page, or tap the Notes tab.
- Tap the Thumbnail / four-squares icon in the top-left to see all your pages.
- Tap the small menu button (the arrow or three dots) under that page's thumbnail and choose Duplicate. A fresh copy appears right after the original.
- To move the copy, tap and hold it, then drag it to where you want it and let go.
Good to know: Always duplicate a template before you write on it. That way your original stays blank and you can keep copying it all year.
Method B: Copy and paste a template exactly where you want it
If you already know where the page should go, like right behind today's daily page or behind a note divider, copy and paste saves you from dragging it across hundreds of pages.
- In Thumbnail view, tap the menu button under the template and choose Copy.
- Close the thumbnails and go to the page you want your template to come after.
- Tap the Add Page (+) icon in the top toolbar, make sure After is selected, and tap Paste Page.
Your template drops in right after the page you're on, and you can paste it again as many times as you need.
Part 2: Adding a PDF insert to your planner as new pages (GoodNotes)
If your insert came as its own PDF, you can bring it straight into your planner instead of keeping it as a separate notebook.
- Open your planner and go to the page you want the insert to come after.
- Tap the Add Page (+) icon in the top toolbar.
- Choose where it should go (Before, After, or Last Page), then tap Import.
- Find the insert PDF in your Files app and tap it. The pages are added to your planner.
Already imported the insert as its own notebook? No problem. Open it, go to Thumbnail view, tap Select, choose the pages you want, and tap Copy. Then head back to your planner and use Add Page (+) → Paste Page like in Method B.
Match your page size: Inserts look best when they're the same orientation as your planner. If your planner is landscape, use landscape inserts so everything lines up when you swipe between pages.
Part 3: Adding an insert or template to a specific page as an image
Sometimes you don't want a new page at all. You want a tracker or a layout to sit on a page that already exists, like a habit tracker on one particular daily page, or a meal planner on this week's spread. This is where PNG inserts and screenshots come in. Because you're placing an image on top of an existing page, you never add or move a page, so every tab and link in your planner keeps working. This method works the same way in GoodNotes and Noteful.
Method A: Place a PNG insert on the page
PNG inserts have transparent backgrounds, so they sit right on top of your planner page.
- Save the PNG insert to your Photos (or keep it in your Files app).
- Go to the exact page in your planner where you want the insert.
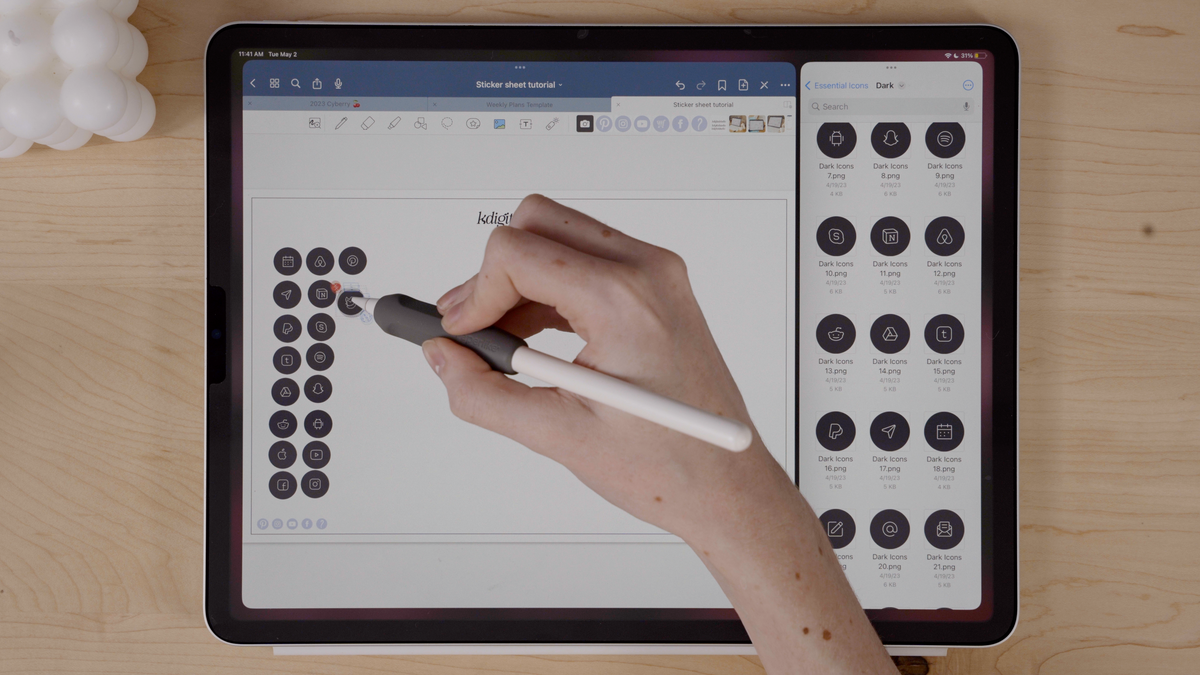
- Tap the Images tool and select your PNG insert.
- Drag it into position and resize it so it sits neatly on the page.
- Lock it in place. Tap the image once to select it, then choose Lock from the pop-up menu.
Method B: Screenshot a template that's already in your planner
Love a layout that's built into your planner and want it on a different page? You can screenshot it and paste it wherever you want.
- Go to the template page in your planner and take a screenshot (press the top button + volume-up, or top button + home).
- Tap the screenshot preview and crop it so it's just the layout, or just the one section of the layout you want. Tap Done and save it to Photos.
- Go to the page in your planner where you want it.
- Tap the Images tool and insert your screenshot. Resize and position it on the page.
- Tap the image once and choose Lock.
Shortcut: After cropping your screenshot, you can tap Done and choose Copy and Delete instead of saving it. Then go to your planner page, tap and hold on the page, and tap Paste. Your template pastes right in without cluttering up your camera roll.
Why locking matters: Once the insert or template is locked, it won't shift or get selected by accident while you write, draw, or add stickers on top of it. To move or remove it later, tap it and choose Unlock first. For more on this trick, see how to duplicate and move pages in a digital planner.
Part 4: Using inserts and templates in Noteful
Noteful works very similarly:
- Open your planner and tap the pages / grid icon to open the page overview.
- To copy a template: tap and hold (or tap the page menu on) the template page, then choose Duplicate. Tap and hold the copy to drag it where you want it.
- To add a PDF insert as new pages: use the Add Page option, choose to import a file, and pick your insert PDF from Files. You can choose where in the planner the new pages are inserted.
- To add a PNG insert or a screenshot to a specific page: use the Image tool to place it on the page, then resize and lock it, just like in Part 3.
For a full walkthrough of Noteful's page tools and everything else the app can do, watch our complete tutorial:
Where should your new pages go?
You can put a page anywhere, but a little bit of a system makes things so much easier to find later. Here's what I recommend:
- Behind a note divider. If your planner has numbered note dividers, give each one a topic (work, school, recipes, a project) and add your pages right behind it. The divider is hyperlinked, so you can jump to that whole section with one tap.
- Right after the page it belongs to. Meeting notes can live right behind that day or week, so they're there when you swipe forward.
- At the end of a section, if you just want extra pages on hand.
- On the page itself. If the layout belongs to one specific day, week, or month, skip the new page and place it as an image using Part 3.
Heads up on hyperlinks: Adding pages won't break your planner's links. Every tab and button still goes to the page it was built for. An insert from a separate file won't have your planner's tabs on it, though, so keep it next to a tabbed page or divider and it's always one swipe away.
Pro tips for inserts and templates
- Keep one clean original. Duplicate first, write second.
- Label your dividers before you fill them. Type or write the topic on the divider and on your index page so future you knows what's where.
- Add a few at a time. If you take notes every week, paste in a handful of notes pages at once so they're ready when you need them.
- Screenshot before you write. If you're going to screenshot a template, do it while the page is still blank so your copy is clean.
- Keep an "inserts" folder in your Files app so every insert you download lives in one place.
- Delete what you don't use. In Thumbnail view, open the page menu and choose Move to Trash. Just be careful not to delete your planner's original hyperlinked pages.
Common questions
Will adding pages break my planner's hyperlinks?
No. Your tabs and buttons keep pointing to the same pages they always did, no matter how many pages you add in between.
Do the tabs still work on a page I duplicated?
Yes. When you duplicate or copy a page from inside your planner, the links on it come along too, so the tabs on your copy work just like the original.
Should I use a PDF insert or a PNG insert?
Use a PDF when you want the insert to be its own page (or several pages). Use a PNG when you want it on a specific page that already exists, like a daily or weekly page, so it stays connected to that page's tabs and links.
Why add a template as an image instead of a new page?
Placing a screenshot or PNG on an existing page puts the layout exactly where you want it without adding a page you have to swipe to. It's the best option when the layout belongs on one specific hyperlinked page.
Can I use an insert from a different shop or planner?
Yes. Any PDF page or PNG can be added to your planner. It may be a different size or style than your planner pages, but it will work the same way.
How many pages can I add?
As many as you want. That's the beauty of a digital planner.
Make your planner yours
Once you know how to add inserts and templates, your planner can grow with you all year. Start with one or two pages you know you'll use, and build from there. For more setup help, see our guides on using digital stickers and using digital planner covers.
Teilen:
Wie man digitale Sticker für Anfänger verwendet